Water Globe Craft: DIY Guide for a Fun and Easy Project
Water globe crafts are a fun and creative way to add a personal touch to your home decor. With just a few simple materials, you can create your own unique water globe that reflects your imagination and style. DIY water globes are a great way to spend quality time with family and friends, and they also make great gifts for loved ones.
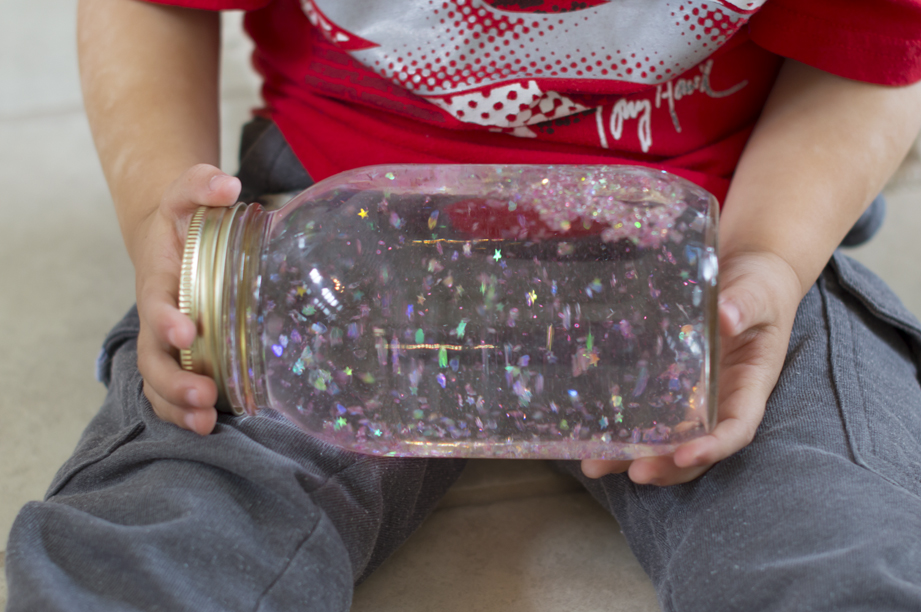
To make your own water globe, all you need is a clear jar or container, distilled water, glycerin, glitter or small figurines, and hot glue. The possibilities for customization are endless, as you can choose any theme or color scheme you like. From winter wonderlands to beach scenes, the only limit is your imagination.
Not only are water globe crafts a fun and easy DIY project, but they can also be a therapeutic and calming activity. As you carefully arrange your figurines and watch the glitter swirl around in the water, you can take a moment to relax and unwind. So why not give it a try? With a little creativity and imagination, you can create your own beautiful water globe that will bring joy and serenity to your home.
Water Globe Craft: DIY Guide for a Fun and Easy Project
Understanding Water Globes
Water globes are a fun and creative craft that can be enjoyed by people of all ages. In this section, we will explore the history of snow globes and the difference between water globes and snow globes.
History of Snow Globes
Snow globes have been around for over 100 years and were first introduced in the late 1800s. They were originally called “snowstorms” and were made of glass with a ceramic or metal base. The first snow globes were filled with water and contained a white powder that would create a snow-like effect when shaken.
Over time, snow globes became more popular and began to feature miniature scenes or figurines. Today, snow globes are considered a collectible item and can be found in various shapes and sizes.
Water Globe vs Snow Globe
While snow globes and water globes may look similar, there are some key differences between the two. Snow globes contain a white powder that creates a snow-like effect when shaken, while water globes contain liquid with floating objects.
Water globes are typically easier to make than snow globes, as they do not require the use of a white powder. Instead, you can use glitter, beads, or other small objects to create a unique and personalized water globe.
Another difference between water globes and snow globes is that water globes are more versatile. You can create water globes with different themes, such as under the sea or holiday-themed, while snow globes are typically associated with winter and the holiday season.
Overall, water globes are a fun and creative craft that can be enjoyed by people of all ages. Whether you are making a water globe for yourself or as a gift for someone else, the possibilities are endless.
Choosing Your Figurine
When it comes to making a water globe craft, selecting the right figurine is crucial. It sets the tone for the entire project and makes it unique. In this section, we'll discuss how to choose the perfect figurine for your water globe craft.
Selecting the Right Figurine
The first thing to consider when selecting a figurine is the theme of your water globe craft. If you're making a water globe for Christmas, consider using a resin figurine of a scuba diving dog or a colorful unicorn. If you're making a water globe for a child's birthday party, an ice cream octopus or a fire breathing dinosaur might be more appropriate.
Another thing to consider is the size of the figurine. If the figurine is too big, it will take up too much space in the globe and won't leave enough room for the water and glitter. If the figurine is too small, it might get lost in the water and won't be visible.
Figurine Placement Tips
Once you've chosen your figurine, it's time to place it in the water globe. Here are some tips to ensure that your figurine is placed correctly:
- Use a waterproof adhesive to attach the figurine to the base of the water globe. This will ensure that the figurine doesn't move around when the globe is shaken.
- Place the figurine in the center of the water globe. This will ensure that it's visible from all angles.
- If you're using multiple figurines in one water globe, make sure they're placed in a way that makes sense. For example, if you're making a beach-themed water globe, place the figurines of the beach chairs and umbrella near the sand.
By following these tips, you can ensure that your water globe craft turns out perfectly.
Materials and Tools
When it comes to creating your own water globe craft, you'll need a few essential supplies. In this section, we'll cover what you need to get started and where to find quality craft materials.
Essential Supplies
Here are some of the essential supplies you'll need to create your own water globe craft:
- Glass globe: This is the most important part of your water globe craft. You can find glass globes in various sizes and shapes. Make sure to choose one that fits your project's theme.
- Base: You'll need a base to hold your glass globe. A wooden base is a popular choice, but you can also use a mason jar lid or any other flat surface.
- Glycerin: Glycerin is used to thicken the water in your globe, which helps the glitter and other objects float more slowly. You can find glycerin at most craft stores.
- Glitter: Glitter is what makes your water globe sparkle. You can find glitter in a variety of colors and sizes. Make sure to choose a kid-friendly glitter pack.
- Water: You'll need water to fill your globe. Make sure to use distilled water to prevent cloudiness.
Finding Quality Craft Materials
When it comes to finding quality craft materials, there are a few things to keep in mind. First, make sure to choose materials that are safe for kids. Look for craft supplies that are labeled as non-toxic and kid-friendly.
Second, choose materials that are high-quality and durable. This will ensure that your water globe craft lasts for a long time. Look for craft supplies that are made from sturdy materials and have good reviews.
Finally, shop around to find the best deals. Craft supplies can be expensive, so it's important to compare prices and look for sales. Check out your local craft store, as well as online retailers like Amazon and Etsy.
By following these tips, you'll be able to find quality craft materials for your water globe project.
Creating Your Water Globe
Step-by-Step DIY Guide
Making your own DIY water globe is a fun and creative project that you can do at home with just a few materials. Here's a step-by-step guide to help you create your own unique water globe:
- Choose a container: You can use any glass jar or container with a tight-fitting lid for your water globe. Make sure it's clean and dry before you start.
- Add your decorations: You can use anything you like to decorate your water globe, such as small figurines, glitter, or beads. Arrange them inside the jar, making sure they fit well and won't move around too much.
- Fill the jar with water: Fill the jar with distilled water, leaving a little bit of space at the top. You can also add a few drops of glycerin to thicken the water and help the glitter or decorations float more slowly.
- Add glitter: If you want to add glitter to your water globe, now is the time to do it. Add a pinch of glitter to the water and stir it gently with a toothpick.
- Seal the jar: Apply a small amount of waterproof glue or silicone sealant around the rim of the jar, then screw the lid on tightly. Make sure the sealant is completely dry before you turn the jar upside down.
- Enjoy your water globe: Turn the jar upside down and watch the glitter or decorations float gently through the water. Shake the jar gently to create a snowstorm effect.
Sealing Techniques
Sealing your water globe is an important step to ensure that the water doesn't leak out. Here are a few sealing techniques you can use:
- Waterproof glue: Apply a small amount of waterproof glue around the rim of the jar, then screw the lid on tightly. Make sure the glue is completely dry before you turn the jar upside down.
- Silicone sealant: Apply a small amount of silicone sealant around the rim of the jar, then screw the lid on tightly. Make sure the sealant is completely dry before you turn the jar upside down.
- Epoxy resin: Mix equal parts of epoxy resin and hardener, then apply it around the rim of the jar. Screw the lid on tightly and let the resin cure for at least 24 hours before you turn the jar upside down.
By following these simple steps, you can create your own beautiful DIY water globe that will bring a touch of magic to any room in your home.
Customization Ideas
When it comes to water globe crafts, the possibilities for customization are endless. Here are a few ideas to get you started:
Themed Water Globes
One of the most fun aspects of water globe crafts is creating a themed globe. For example, you could create a Christmas craft by filling the globe with miniature Christmas trees, snowflakes, and a small Santa Claus figurine. Or, you could create a mini magical sea world by adding seashells, sand, and a tiny mermaid figurine. The options are endless, and you can let your creativity run wild.
Adding Personal Touches
Another great way to customize your water globe is by adding personal touches. You could create a unique resin figurine of yourself or a loved one and add it to the globe. Or, you could use a 24 pack of clay to create miniature versions of your pets or favorite animals. The clay comes in 12 different colors, so you can get creative with your designs. You could also add a personal message or quote to the base of the globe using a permanent marker.
To add even more fun to your water globe craft, you could include one of four fun figurines in the globe. These figurines include a unicorn, a dinosaur, a flamingo, and a llama. You can mix and match these figurines with different themes to create unique and personalized water globes.
Overall, the customization options for water globe crafts are truly endless. With a little creativity and some fun figurines and decorations, you can create a one-of-a-kind water globe that is uniquely yours.
Safety and Maintenance
Ensuring Child Safety
At [our company], we take child safety very seriously. That's why we've created a completely kid-safe and nontoxic DIY water globes set. We have used high-quality materials to ensure that our product is safe for children to use. However, we still recommend that parents supervise their children while they are making and playing with their water globes.
Additionally, we recommend that children do not put their water globes in their mouths or drink the water inside. Although the water is nontoxic, it is not meant for consumption. We also advise that children do not play with their water globes near open flames or heat sources.
Water Globe Care and Preservation
To ensure that your child's water globe lasts a long time, we recommend that you take good care of it. Here are some tips for maintaining your water globe:
- Avoid shaking the water globe too vigorously, as this can cause the water to become cloudy or the glitter to clump together.
- Keep your water globe away from direct sunlight, as this can cause the water to evaporate and the colors to fade.
- If your water globe gets dirty, you can clean it by wiping it with a soft, damp cloth. Avoid using harsh chemicals or abrasive materials, as these can damage the globe.
- If the water in your globe evaporates or leaks out, you can refill it by unscrewing the base and adding distilled water. Be sure not to overfill the globe, as this can cause it to leak.
By following these simple tips, you can ensure that your child's water globe stays in great condition and provides hours of enjoyment.
Educational Benefits
As parents, we are always looking for ways to spark our children's imagination and creativity while also helping them develop important skills. The Creative Kids Water Globe Set is a great way to do just that. Here are some of the educational benefits of making water globes with your kids:
Developing Fine Motor Skills
Making a water globe involves several steps that require fine motor skills. Children will need to use their hands to mold the clay, place the figurines, and add the water. These actions help develop hand-eye coordination, dexterity, and precision. As children work on their water globes, they will be strengthening the muscles in their hands and fingers, which will help them with tasks such as writing, drawing, and using scissors.
Encouraging Creativity
The Creative Kids Water Globe Set is a great way to encourage creativity in your children. They can choose their own figurines, design their own landscapes, and add their own personal touches to each globe. This allows them to express their creativity and imagination in a unique and fun way. Making water globes can also help children develop problem-solving skills as they figure out how to make their ideas come to life.
In conclusion, the Creative Kids Water Globe Set is a great way to encourage creativity and develop important skills in your children. By making water globes, they will be able to develop their fine motor skills, express their creativity, and have fun in the process.
Valentine's DIY Water Globe
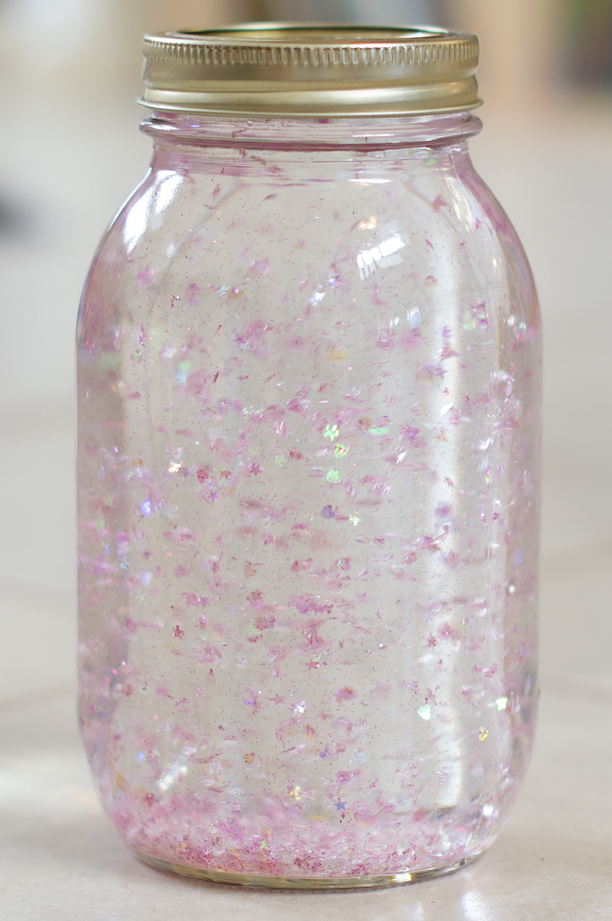
Create a Valentine's DIY Water Globe in mere minutes with this simple tutorial and Martha Stewart Iridescent Hearts and Glitter. The combination of iridescent glitter and sparkling glitter creates the feeling of confetti in a jar, without the mess!
Supplies:
- Smooth Mason Jar
- Distilled Water
- Martha Stewart Iridescent Hearts and Stars Glitter – Cotton Candy
- Martha Stewart Iridescent Hearts and Stars Glitter – Sugar Cube
- Martha Stewart Glitter Set – Tourmaline
- Martha Stewart Glitter Set – Crystal
- Glycerin
(Optional: Clear-drying epoxy)
Directions:
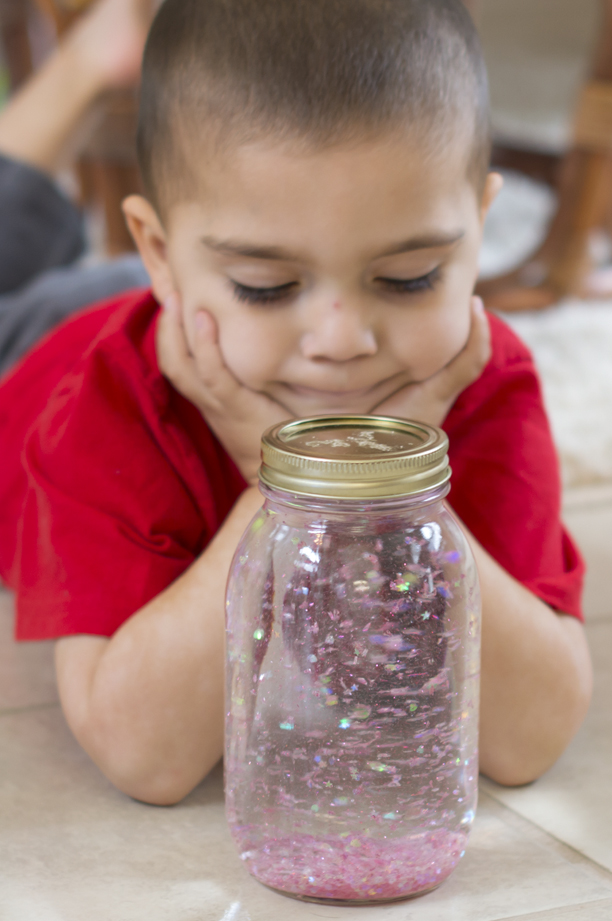
- Fill smooth mason jar almost to the top with distilled water. Add Martha Stewart Glitter and Martha Stewart Iridescent Hearts and Stars Glitter to the jar.
- Don't forget to let little hands help!
- Fill the jar with as much (or as little) glitter as you like.
- Add a dash of glycerin, a little at a time. I used 1/2 – 3/4 of a teaspoon for a large smooth mason jar. You want just enough so the glitter doesn't fall too fast, but not so much that all the glitter clumps together.
- Fill the mason jar with additional distilled water until it is full. Screw the lid on tightly.
- To seal the jar permanently, add epoxy to the lid before closing. Turn the jar over and back again—and let it rain confetti!
Alternative Water Globe Crafts
If you're looking for a water globe craft that doesn't involve water, there are plenty of options available. Here are a few ideas to get you started:
Waterless Snow Globe Options
Waterless snow globes are a popular alternative to traditional water-filled snow globes. These snow globes use glycerin or baby oil instead of water, which means you don't have to worry about leaks or spills. Plus, they're just as fun to shake and watch as regular snow globes.
To make a waterless snow globe, you'll need a clear glass jar or container, a small figurine or decoration, fake snow, and glycerin or baby oil. Simply glue the figurine to the inside of the jar lid, add a few teaspoons of fake snow to the bottom of the jar, and fill the jar with glycerin or baby oil. Screw the lid onto the jar, and you're done!
Sensory Water Globe Projects
Water globes can also be a great sensory craft project for kids. Instead of using water, you can fill the globe with different materials to create a sensory experience. For example, you could fill the globe with glitter, confetti, or small beads.
To make a sensory water globe, you'll need a clear glass jar or container, your chosen sensory materials, and a small figurine or decoration. Simply glue the figurine to the inside of the jar lid, add your sensory materials to the jar, and screw the lid onto the jar. Shake the globe to watch the materials swirl around and create a mesmerizing effect.
Overall, waterless snow globes and sensory water globes are both fun and easy alternatives to traditional water-filled snow globes. Try out these ideas, or come up with your own creative twist on the water globe craft!
Frequently Asked Questions
What materials do I need for a DIY snow globe?
For a DIY snow globe, you will need a glass jar with a tight-fitting lid, distilled water, glycerin, glitter or fake snow, and a waterproof glue. You can also add miniature figurines or objects to create a scene inside the globe.
Can I put a picture inside my snow globe, and how?
Yes, you can put a picture inside your snow globe. First, print the picture on waterproof paper and cut it to fit the size of the jar lid. Then, glue the picture to the inside of the lid using waterproof glue. After the glue dries, proceed with the snow globe assembly.
What is the best way to create fake snow for my snow globe?
The best way to create fake snow for your snow globe is to use Epsom salt or baking soda. Mix the salt or soda with a small amount of glitter to create a sparkling effect. You can also use confetti or small foam balls as fake snow.
What type of liquid should I use for the snow globe to get the best effect?
To get the best effect, use distilled water mixed with glycerin in a 1:1 ratio. The glycerin will thicken the water and make the glitter or fake snow fall slowly and gracefully.
How can I make the snow or glitter fall slowly in my snow globe?
To make the snow or glitter fall slowly in your snow globe, use a mixture of distilled water and glycerin in a 1:1 ratio. Adjust the amount of glycerin to achieve the desired effect. You can also add a small amount of baby oil to the mixture to create a swirling effect.
Is it possible to use baby oil in a snow globe, and what are the benefits?
Yes, it is possible to use baby oil in a snow globe. The benefits of using baby oil are that it creates a swirling effect and makes the snow or glitter fall more slowly. However, using too much baby oil can make the snow or glitter clump together and reduce the overall effect of the snow globe.


This is such an awesome idea, I’m going to make one with Halloween themed glitter!